Thursday, December 22, 2016

Rose Petal Jam Cake


Rose Petal Jam Cake
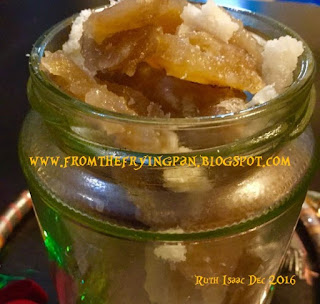
My sister gave me a bottle of Rose Petal Jam on my last visit to India and it took me back to the days when most Bangaloreans had dark pink and yellow roses in their gardens.  We were no exception.  My Dad was very interested in gardening and cooking and there was something interesting to learn every day.  Early morning, when the roses were in bloom, he would go into the garden and carefully check the roses and other blooms.  He taught me to collect these rose petals, wash and dry them very gently and layer them in a large glass bottle with sugar.  Every other day, one of us would add more rose petals to the bottle and within a month to 6 weeks, we had the most exquisite jam I have ever eaten.  More often than not, we ate it plain and thoroughly enjoyed every luscious spoonful.

This year, I decided to add it to a cake and see what happens.  The result- a tempting, enjoyable, fragrant very unique Christmas Cake.

The Recipe:

2 cups fortified wheat flour; 40 gms maida; 1 tsp baking powder; 1/2 tsp baking soda; 20gms sooji; 270 gms milk powder; 16 cardamoms, powdered; 2 cups milk; 1/2 cup caster sugar; ½ cup Rose Petal Jam; 1 cup butter at room temperature; 2 tsp vanilla essence; pinch of salt; ½ cup ghee residue (optional).
Sieve the flour, milk powder, baking powder, baking soda, sooji and salt together in a large bowl.  Mix the milk, caster sugar, oil, cardamom powder, ghee residue and vanilla extract in another bowl.
Add the dry ingredients by the spoon by spoon to the wet ingredients and gently mix to a smooth glossy texture.
Grease and line 7 inches by 3 inches foil cake pans ( 3) and divide the mixture between them.  Bake in a preheated oven at 180Celcius for 35 minutes or until metal skewer inserted in centre of cake comes out clean.  Cool, pack and give to your lucky friends. 
To Attend My Food Workshop CLICK HERE


Thursday, December 15, 2016

Ginger Two Ways Candied And Preserved


Ginger Two Ways - Candied and Preserved

The making of Ginger Preserve every year  in August was a family ritual.  That was the time tender ginger appeared in the market and my Mum would buy a couple of kgs from Russel Market, to last the whole year and to give as gifts to all her cronies.  This is a recipe she got during her stay at Nazareth Convent, Mangalore and one we all loved.  The whole family would sit around the table and skin and fork the tender ginger under my Mum's eagle eye.  The process took a few days and after that we would all stand and gloat at the jars of Golden Ginger Preserve carefully arranged on the shelves in the store room, the key to which was always with her. Most of the bottles were given away and used in cakes and sometimes as a treat, we had a piece with thick, cream after dinner.  

In Malaysia, tender ginger is available throughout the year, so I stock up during December and this year, I decided to make Candied Ginger as well which is an ideal tit bit after an appetizing lunch.

The Recipe:

Ginger Preserve
1 1/4 kg tender ginger; 1 medium raw egg; 6 cups (250ml x 6) water; 1,100gms white sugar ( I used brown for a gorgeous colour); juice of 1 lime.
12 cups water ( 250 ml x 6)
6 cups water (250 ml x 6)

Discard the fibrous parts of the  ginger and scrape off the skin.  Wash well.  Fork both sides of the ginger pieces and place in water to cover.  Change the water everyday for three consecutive days.  On the third day, squeeze the ginger well, discarding the water and pressure cook the ginger in 12 cups ( 250 ml x 12) for 45 minutes.  Cool and drain completely.  Spread the ginger on a cutting board, place a clean kitchen towel over it and place a heavy weight on it over night for the water to drain. ( I used my cooker filled with water as a weight).  Next day make a sugar syrup with 6 cups water and sugar.  Add the egg (broken with the shell) and bring to the boil.  (Boiling the egg with the syrup will make the syrup very clear).  Lower heat and simmer for 15 minutes.  Cool and strain through a muslin cloth, discarding the egg.  Return the sugar syrup to the heat, add the ginger and boil till a honey like consistency is reached.  Just before removing from the flame, add the juice of 1 lime.  Stir well, boil for a minute and remove from heat.  Cool overnight and bottle in sterilized glass jars or bottles.  Label and store for as long as they last.  Use in cakes, ice cream or serve with cream as a decadent indulgence.

NB:  I used less sugar and the preserve was still good.

Candied Ginger
I acquired a taste for Candied Ginger thanks to my love for Ginger Preserve.  When I came to Kuala Lumpur, I used to buy it whenever I saw it until I decided to make it myself.  The results were successful and the rest is history.  We now have our supply of Candied Ginger all year long.

The Recipe:

500 gms tender ginger; 6 cups water; 500 gms brown sugar ( I prefer brown sugar as the ginger gets a glorious colour); juice of 1/2 lime

I used less sugar.

Scrape the skin off the ginger, discarding the fibrous parts.  Wash and cut into equal sized pieces and then pressure cook in 6 cups water for 45 minutes until tender.  Place in a collander to drain off the liquid, reserving 1/8 cup of the ginger water.
Next add the ginger, sugar and water in a heavy bottomed pan and bring to the boil on medium high heat, stirring frequently until the liquid has almost evaporated.  Add the lime juice and boil till for a couple of minutes.  As soon as the sugar begins to crystalize.  This takes about 30 minutes.  Transfer the ginger to a tray lined with baking paper and spread out to separate the pieces.  Cool completely and store in an airtight container, using as desired.  Keep the  remaining sugar crystals for use in your tea or coffee or as a topping for ice cream.


Wednesday, November 30, 2016

Carrot Cake Breakfast Squares


Carrot Cake Breakfast Squares
Carrot Cake is a favourite of ours, so whenever we pass by a cake shop we indulge in a large slice even though we know how to make it ourselves. While browsing the internet a while ago I came across this healthy version which is a delightful, fragrant version of a popular dessert cake.  Have it for breakfast or at any time you choose without feeling guilty.  And oh yes, you can eat a double helping every time!

Original Recipe from www.eatwiseuk.com

However, I have tweaked it and made it my own.

The Recipe:

1 cup instant oats; 2 tbsp Herbalife Protein Powder;1/2 tsp baking powder; 1/2 tsp cinnamon; 1/8 tsp nutmeg; pinch of salt; 1 large egg; 1/2 cup homemade curds; 1 tsp vanilla essence; 1/2 cup carrot, grated; 2 tbsp honey;2 tbsp walnuts, chopped; 2 tbs cashew nuts, chopped; 5 large dates, stoned and chopped ;1 tbsp raisins.


Heat the oven to 180°C/350°F/gas 4 and grease a non-stick baking tray.  Mix the oats, protein powder, baking powder, cinnamon, nutmeg and salt together in a large bowl. In a separate bowl, whisk together the eggs, curds, vanilla, grated carrot and honey.  Add the wet ingredients to the dry, mix to combine, then stir in the cashew nuts and dates.  Scatter the raisins and walnuts on top and bake for 30 minutes until the top is golden brown and the mixture is coming away from the sides of the tin.  Cut into squares and enjoy for breakfast or as a snack.  Serves 3.
Store in the fridge for up to 5 days.


Thursday, November 24, 2016

Indian Rice Pudding

Kheer  and Payasa
This is one recipe that I wanted to blog about for years, but somehow never got down to it. Kheer or Payasa/Payasam as it is called in the South of India is a rice pudding from the cuisine of the Indian Subcontinent, made by boiling rice, broken wheat, tapioca, or vermicelli with milk and sugar; it is flavoured with cardamom and other spices, raisins, saffron, cashews, pistachios or almonds.
This is a versatile preparation and can be made in a myriad of ways.  Most households have their own recipe and it is a very popular dessert as it is so easy to make and the ingredients required would be available anytime in all kitchens.  As children we especially loved going for weddings knowing that we could eat unlimited amounts of this mouth watering concoction.
The Recipe:
1/8 cup basmathi rice, washed and drained; 1 cup water; 2 cups low fat milk; ½ cup milk powder; 2 tbsp. chopped nuts; 2 tbsp. almond meal; 2 tbsp. raisins; 2 cloves and a 1 inch stick of cinnamon; sugar to taste; a pinch of salt and a few strands of saffron dissolved in 2 tbsp. warm water;; a few drops of rose essence- optional.

Pressure cook the rice in 1 cup water for 3 minutes.  Cool and open the cooker and transfer the contents to a large nonstick pan.  Mix the milk and milk powder together and add with the rest of the ingredients except the saffron to the rice.  Bring to the boil and lower flame, stirring now and then to prevent sticking at the bottom.  When the mixture is thick enough add the saffron mixed with water and remove from heat.  Serve hot or cold garnished with nuts.


Sunday, October 23, 2016

Ma's Sago And Tender Coconut Payasa

Sago And Tender Coconut Payasam
A couple of years ago, I decided to start cooking classes and my daughter saw an ad on Facebook and sent it to me.  At the same time, a friend emailed me the link.  I was excited with what I saw and the rest is history.  Thanks to a wonderful group for helping me discover myself through cooking.
The recipe I’d like to share today is a personal favourite and like most of my recipes very simple.  Am sure you will like it to.

The Recipe:

Sago is a starch extracted from the spongy centre, or pith, of various tropical palm stems and has become a very popular dessert in Mangalore.
¼ cup sago; sugar to taste; 1 tbsp raisins; 1 tbsp cashewnuts and a pinch of cardamom or cinnamon as desired; a 1/2 cup  tender coconut, cut into pieces; a pinch of salt; 1 cup milk; 45 gms of low fat milk powder.
Whisk the milk and milk powder together and keep aside till required.
Soak the sago in 3 cups water for half an hour.  This is to soften it.   Drain, add 1 ½ cups water and bring to the boil, lower flame for 5 minutes.  While cooking the sago will become transparent and may have a white spot in the middle.  This will become transparent by the time the Payasa is served.  Add milk, sugar to taste, raisins, cashew nuts, salt,and spices.  Remove from fire, cover and cool for 20 minutes.  Serve hot or cold.


Tuesday, October 4, 2016

Lemon Grass Rice


Lemon Grass Rice
I was invited to attend a food workshop early last month and was very excited to know that the menu featured Malaysian recipes.  The host was awesome and the food she cooked so delicious that I nearly forgot my manners in my haste to get to the table.  The dish I liked best was Nasi Beringin or Lemon Grass Rice as I prefer to call it.  It is so aromatic and delicious. Truly, we eat it thrice- with our nose, eyes and last but not least our tongue.

The Recipe:

1 cup basmathi rice, washed and drained; 1 cup low fat milk or evaporated milk; 1 cup warm water; 1/2 inch piece ginger, minced; 1 inch of galangal, sliced- this is optional; 5 stalks lemon grass- use only the whilte part - slice each stalk into two; 2 medium onions sliced; a few spring onions, cut fine;  1 stick cinnamon; 3 cloves; 3 cardamoms; 1 star anise; 1 tsp ghee; 1 tbsp olive oil;  salt to taste.
For Garnish:  Fried shallots and a handful of coriander leaves and hard boiled eggs ( my added twist which is optional)

NB:  Actually shallots or sambar onions are used for this recipe.  I was in a hurry to make it and preferred to use the ordinary onions.
Galangal is a fragrant ginger that I love to use in my cooking.

Heat ghee and olive oil in a non stick pan.  Saute the spices, onions or shallots, spring onions, ginger, galangal and lemon grass until onions are glazed.  Add the rice and gently stir fry till grains are glazed.  Transfer to rice cooker and add the water, milk and salt to taste.  Adjust the settings.  When the rice is cooked the light will go off.  Fluff up and cool for a few minutes to let the steam escape.  Remove the lemon grass, spices and galangal.  Serve hot garnished with coriander leaves, fried onions and boiled eggs.


Thursday, September 29, 2016

Honey Mustard Chicken


Honey Mustard Chicken

A while ago, we received a festive hamper that contained a large bottle of organic honey and some delicious looking mustard.  It remained in my kitchen cupboard, waiting for me to get inspired to use it in my culinary endeavours.  Well, last week was the auspicious day and I finally used the honey and the mustard extravagantly to create a memorable baked dish.

900gms skinless chicken, jointed, washed and drained; 1/4 cup prepared mustard; 1/4 cup honey; 2 tbsp curds; salt and pepper to taste; 2 cloves garlic, minced; a few basil leaves- I used Italian basil which grows in my garden, chopped; salt to taste; 1 tbsp olive oil.
Garnish: More Basil Leaves according to taste.

Whisk the honey, mustard, curds, olive oil,  salt and pepper to a smooth consistency.  Stir in the garlic and chopped basil leaves.  Place the chicken in a baking dish and pour the mixture over the chicken.  Make sure all the pieces are covered.  Cover and keep aside for 20 minutes.  Bake in preheated oven at 175 degrees C for 45 minutes to 1 hour until chicken is cooked and juices run clear.  Garnish with the basil leaves.  Rest for 10 minutes. Serve with a salad for lunch or dinner. 

 Cooking Classes CLICK HERE